void setup() {
// initialize digital pin LED_BUILTIN as an output.
pinMode(LED_BUILTIN, OUTPUT);
}
// the loop function runs over and over again forever
void loop() {
digitalWrite(LED_BUILTIN, HIGH); // turn the LED on (HIGH is the voltage level)
delay(1000); // wait for a second
digitalWrite(LED_BUILTIN, LOW); // turn the LED off by making the voltage LOW
delay(1000); // wait for a second
}
编译并下载到板上,可以看到LED灯闪烁。
补充:
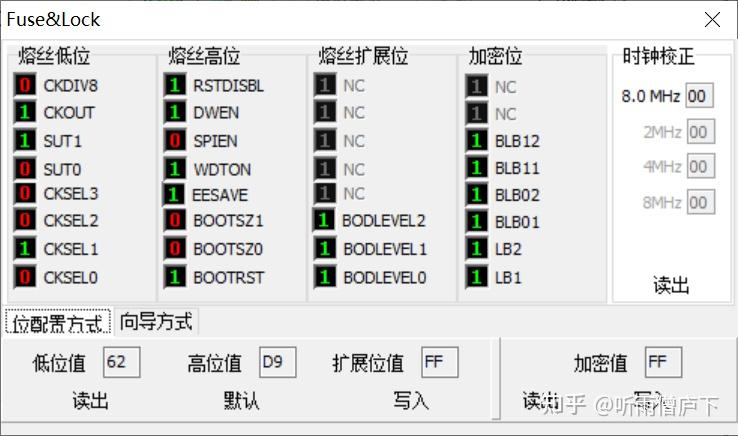
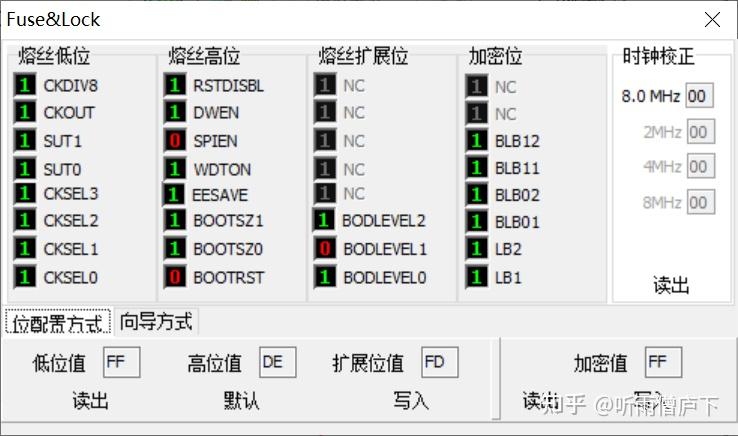
ATmega32u4很多被用于客制化键盘diy中,所以,补充一下对这颗mcu的烧写方法。基本方法和接线都和上面的ATmega328类似。不同的地方在于熔丝位和烧写固件。
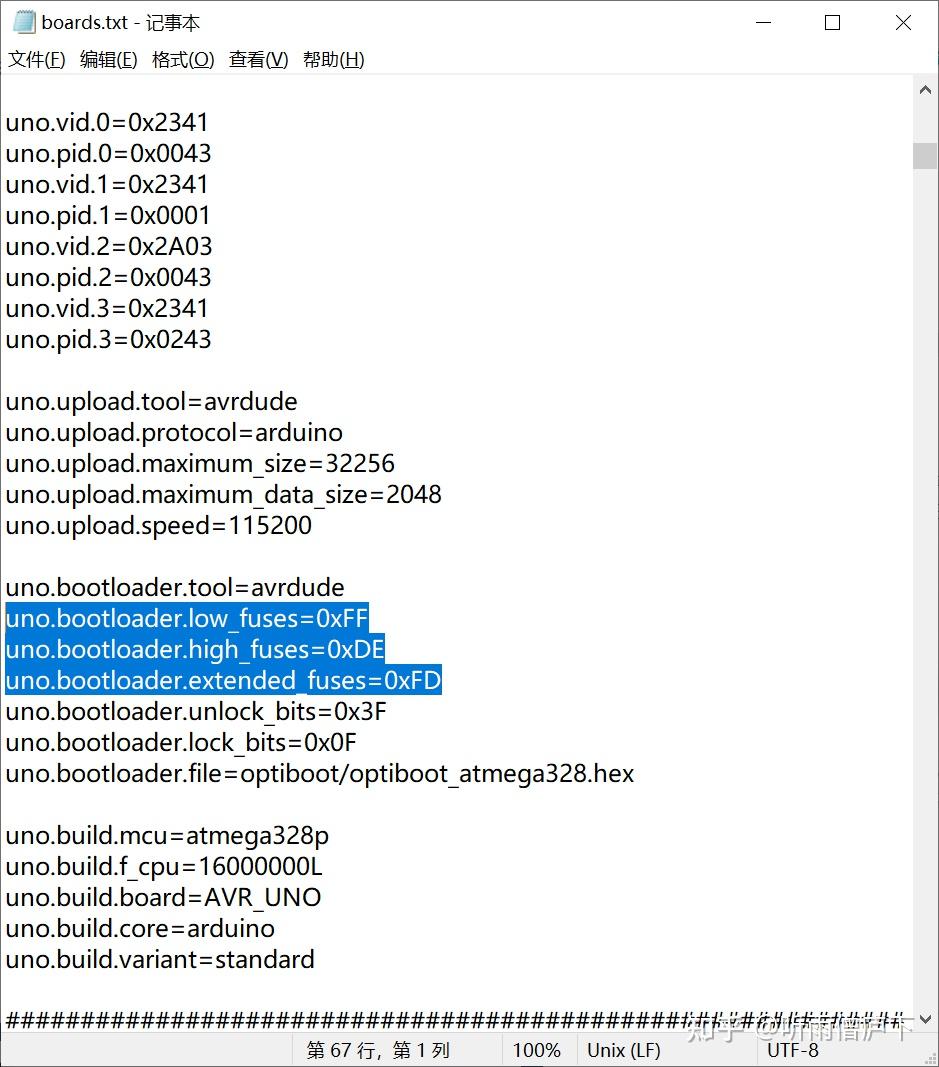
ATmega32u4熔丝位需要改为:
leonardo.bootloader.low_fuses=0xff
leonardo.bootloader.high_fuses=0xd8
leonardo.bootloader.extended_fuses=0xcb
leonardo.bootloader.unlock_bits=0x3F
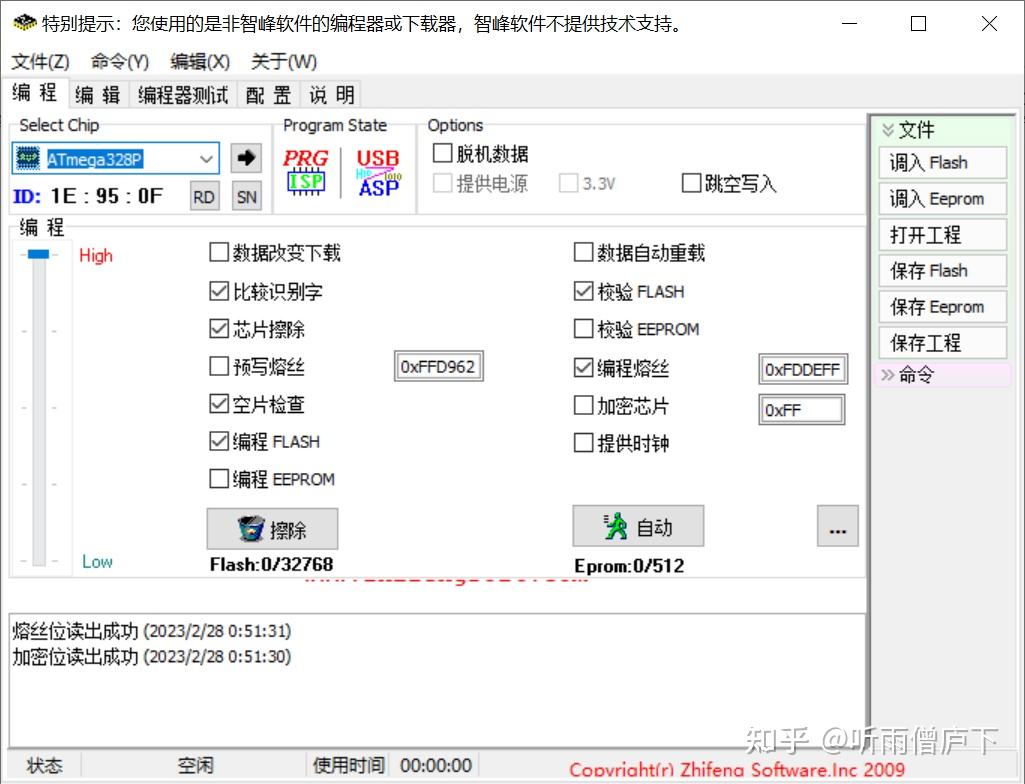
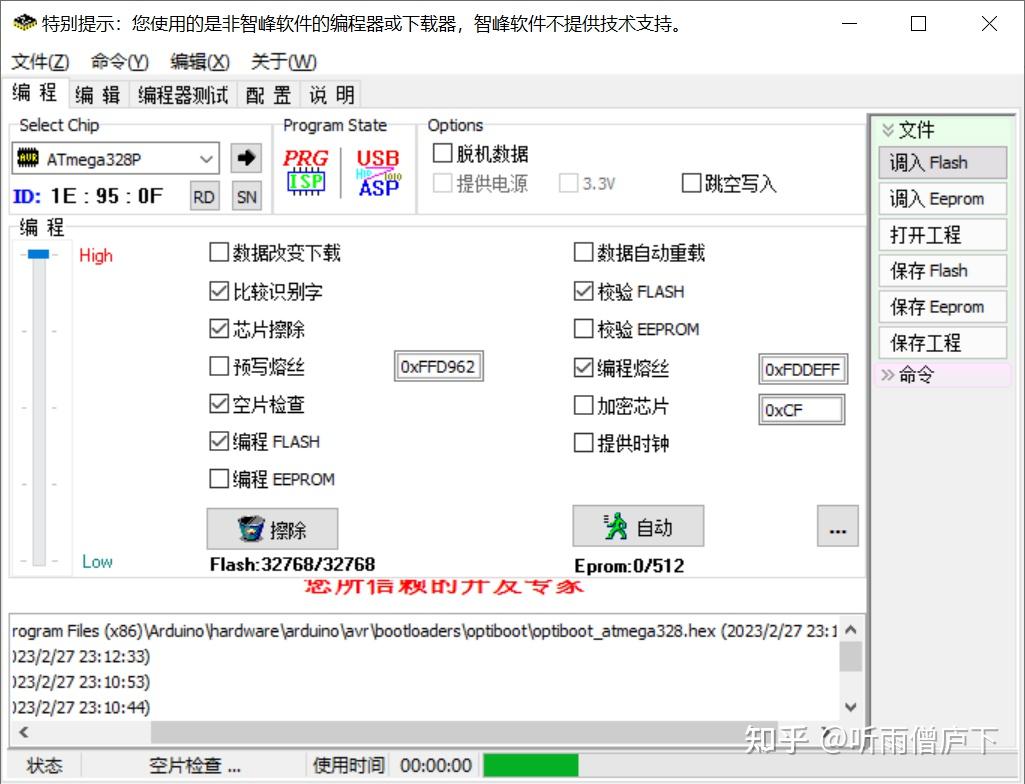
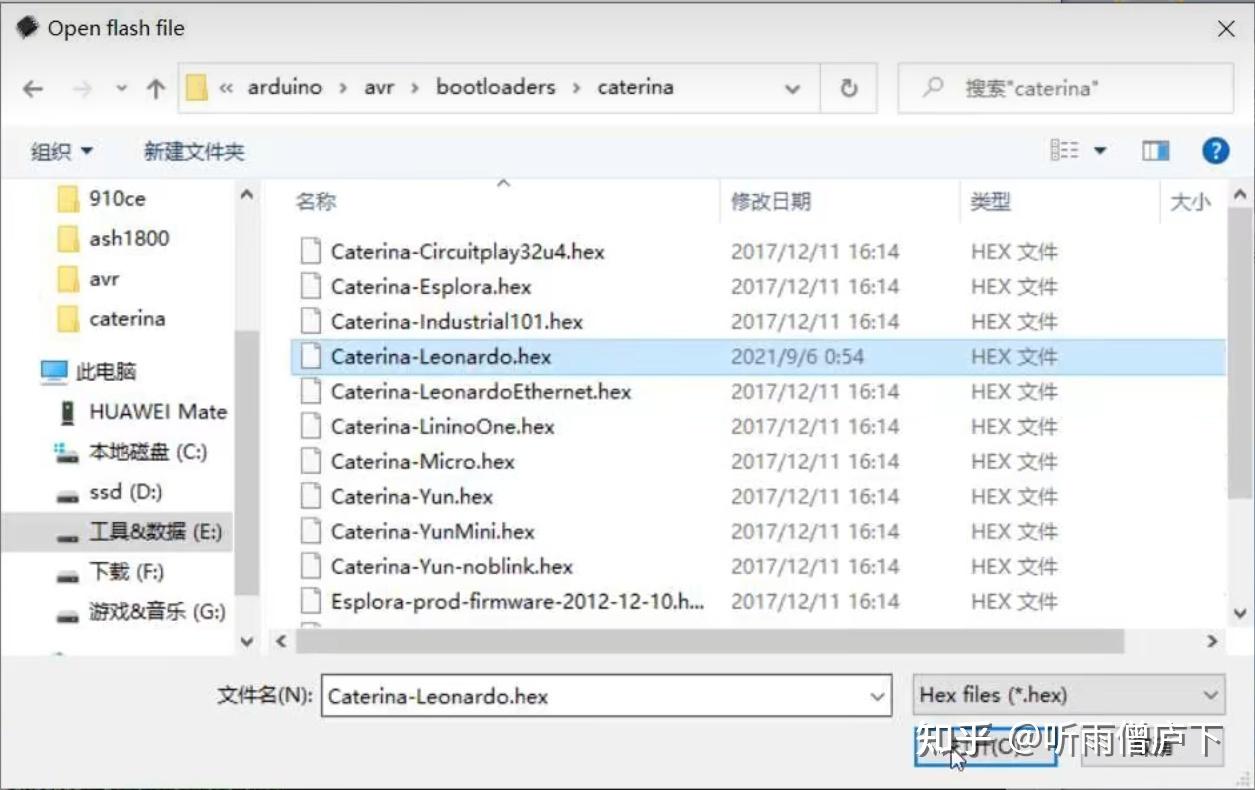
烧写的hex文件位置在
\Arduino\hardware\arduino\avr\bootloaders\caterina下的Caterina-Leonardo.hex


 发表于 2023-5-1 15:38:37